Showing posts with label Paper Piecing. Show all posts

Sunday, September 18, 2022

The Queen of Gadgets Blog Hop

What is your favorite sewing gadget?
The Queen of Gadgets Blog Hop
The challenge:
Use your favorite sewing tool to create a project. 
Tell us and show us why you love it.

I not only ‘used’ all my gadgets, I chose to ‘sew’ my favorite, or more accurately, my most used gadgets, around the border of a sewing themed panel.

Pins
I created the paper pieced pattern for the pin then die cut the pin heads using a thinlet circle die.  They are raw edge appliqued to the tops of the pin metal.


Pincushion
Although I haven’t used an old fashioned tomato pin cushion for ages, I did have one way back in time.  I’ve added real pins to the finished wall quilt in all the pincushions.
This paper pieced pattern is by Full Bobbin Designs on Etsy


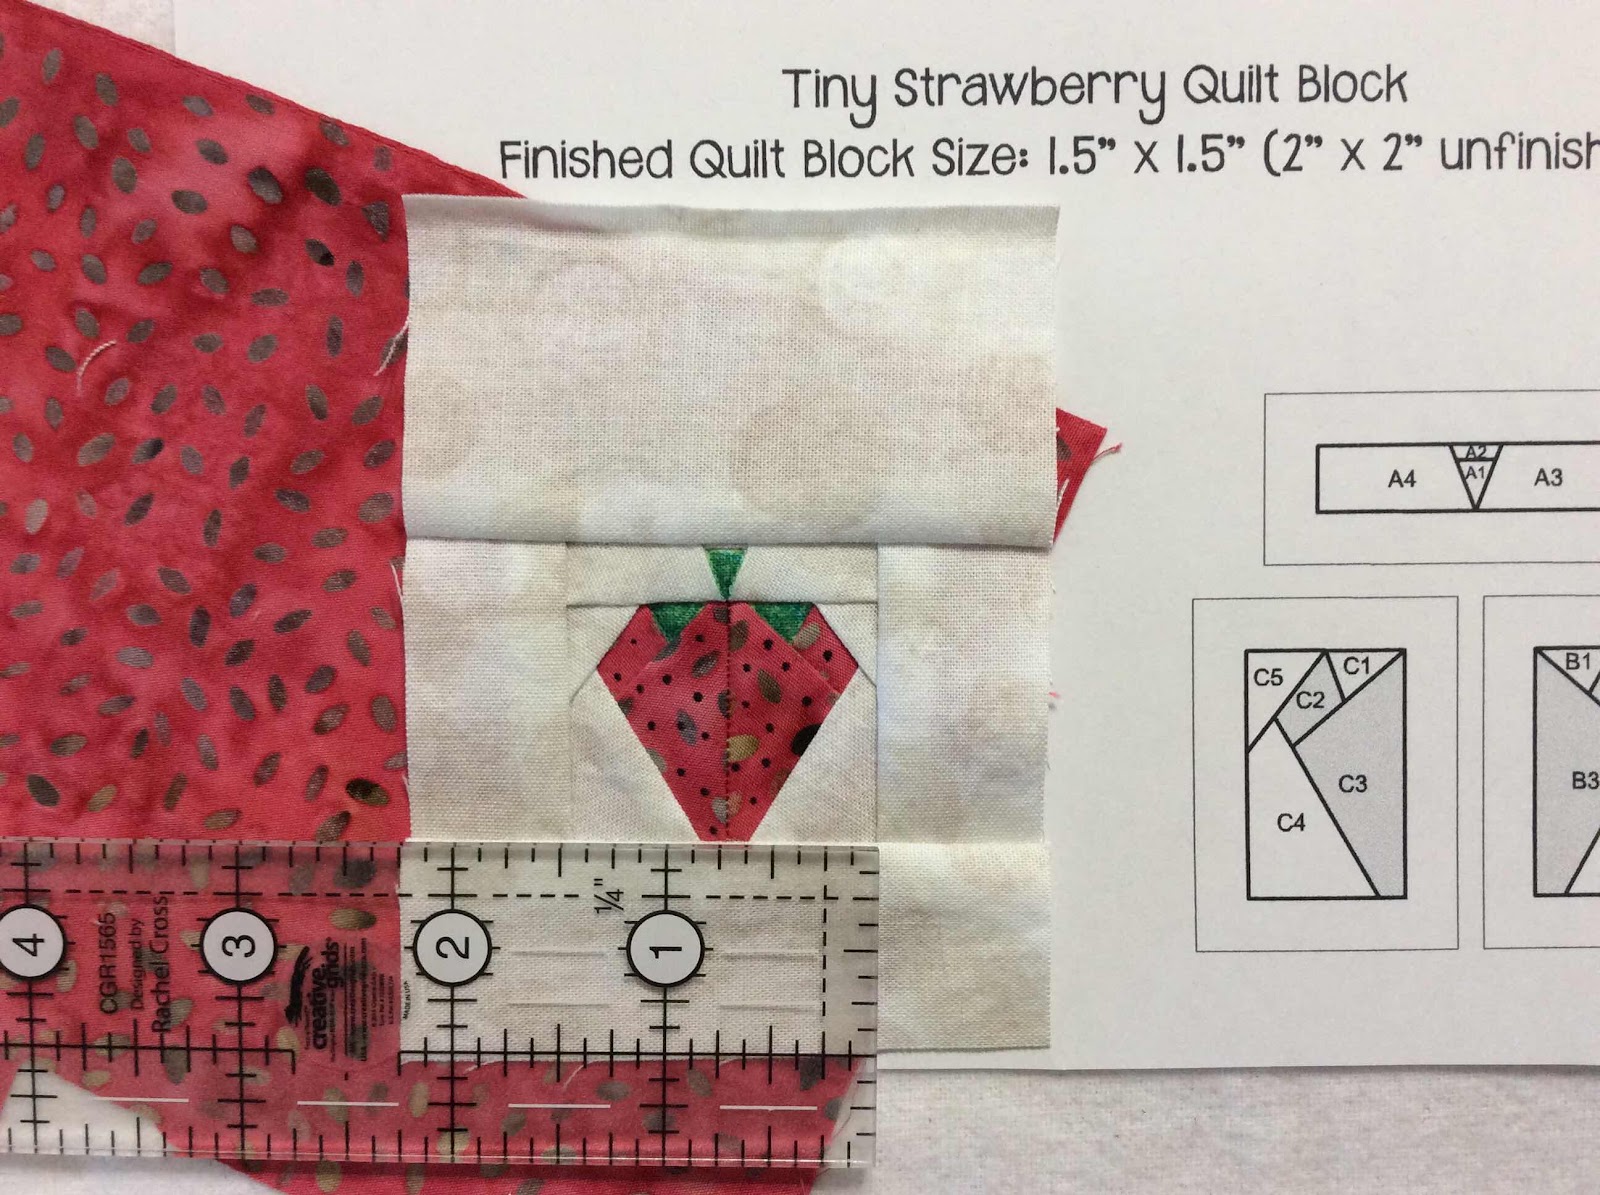
Can’t forget the little strawberry that is usually attached to the tomato pincushion.
This paper pieced pattern is by Center Street Quilts on Etsy.


This panel is of an old needle book design so I added a pair of old black handled scissors instead of a modern rotary cutter.  I do still use scissors.
This paper pieced pattern is by Full Bobbin Designs on Etsy.


A seam ripper might not be considered a favorite sewing gadget, but it’s a necessity when my machine sews something wrong.
This paper pieced pattern is by Full Bobbin Designs on Etsy.


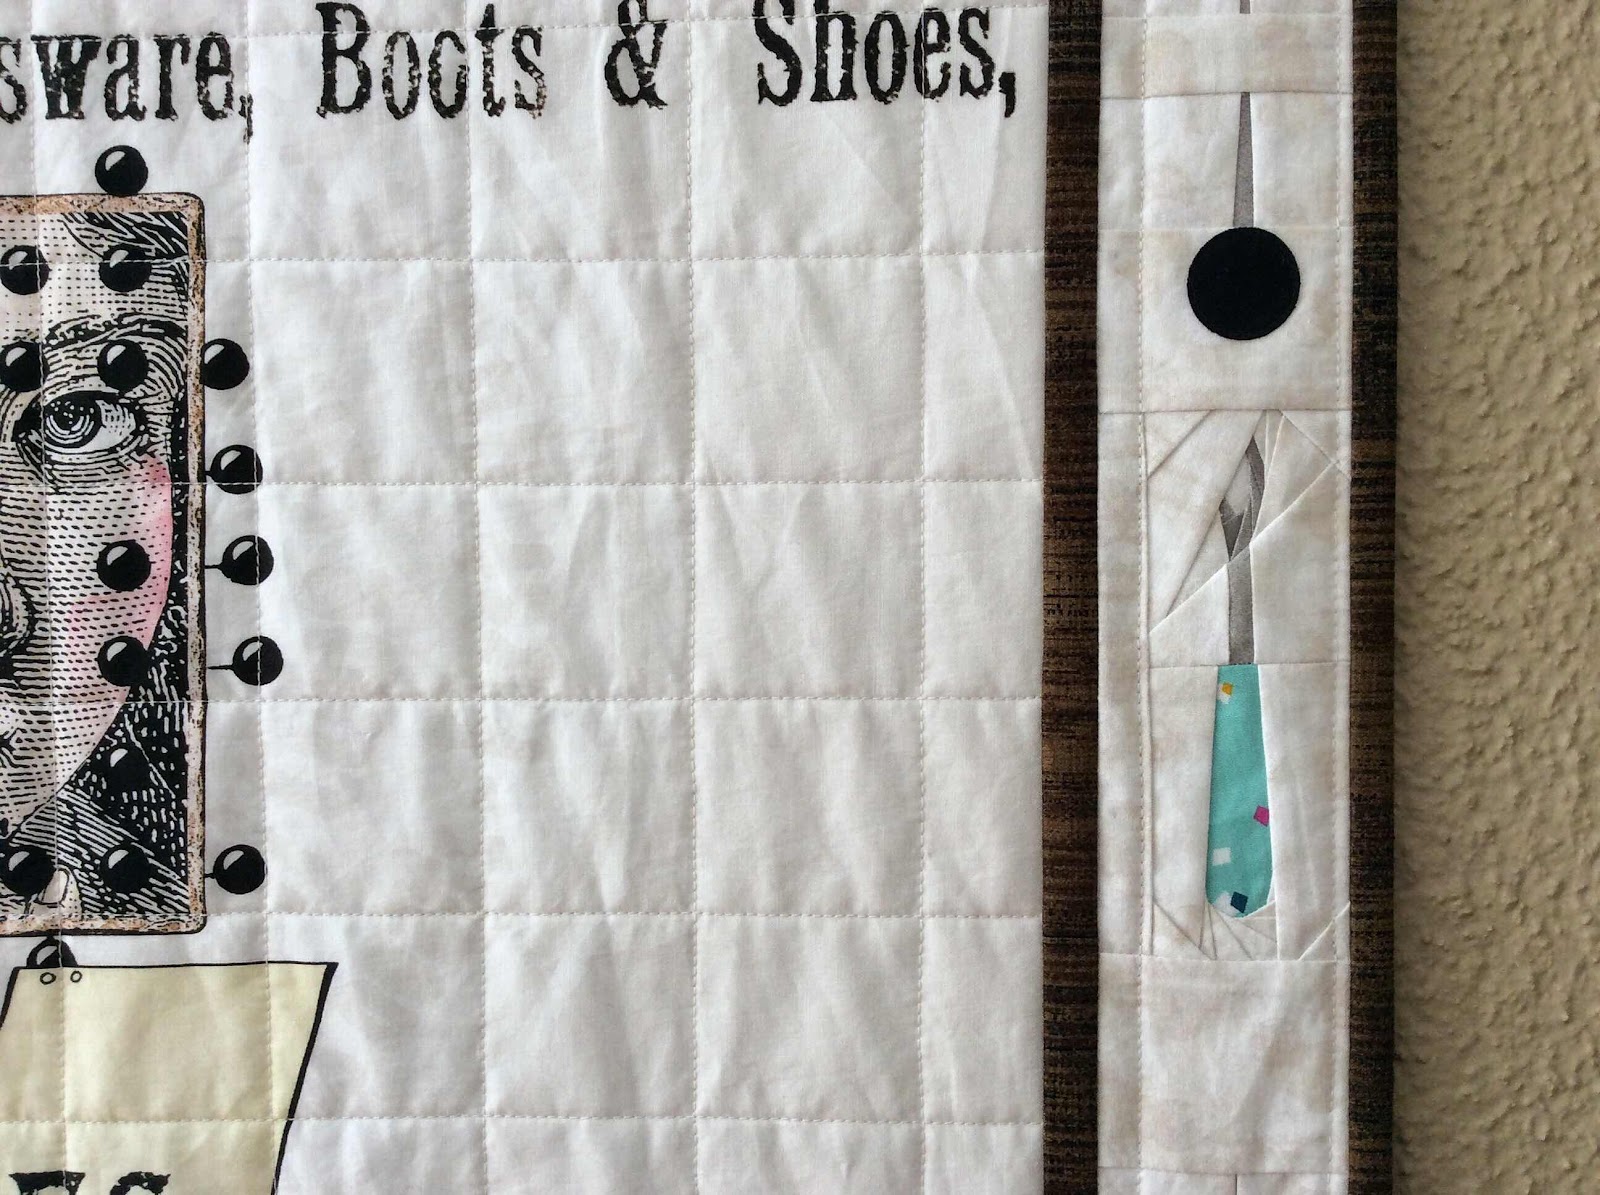
I also added real pins to the printed tomato pincushion on the panel.


The completed wall quilt.
My grandmother actually had one of those cardboard pin blocks.
There were several pins still in it.


This is the fourth and final gifted panel I made into a wall quilt.
This panel was very fun to make a border for.  It wasn’t until I was ready to sew everything together that this panel made known how terribly out of whack it is!!!  The worse I have ever had.  So disappointing as this one was my favorite.  It measures approx. 29” X 49”. The top is 29”, the bottom is 29.5”. There was no way to even fudge squaring it up without cutting into the words or design.  The quilt is okay hanging on a plain wall.  But my wall where I wanted to hang it is bead board.  The stripes in the board make it look even more than 1/2” out of whack.
Such is the life of a fabric panel.

The panel is by J. Wecker Frisch, Joy Studio and Riley Blake Designs


Wednesday, September 14, 2022

Bird Postcard Process

Just another bird postcard.  But one different from any other I have made.
He is a quilt block pattern by Nadia Ridgeway of ellisandhiggs.com that I purchased on Etsy.

I redesigned him to be a paper pieced pattern, reduced in size for a postcard.


Here I show a peek into my process of changing a quilt block pattern into a paper pieced pattern that I can sew as a postcard.  Anything can be sewn from the pattern though.  I just happen to love sewing postcards.


Quite an involved process, but the work only needs doing once then the pattern is reusable infinitely after that.  I’m looking forward to a variety of bird colors with this pattern.

Tuesday, April 26, 2022

Bunny Zip Pouch

Etsy is full of fun and cute paper piecing patterns.


This bunny pattern found at Bubble Stitch, looks more complicated than it actually is.  I then tossed in a fabric color change.  The pattern is designed as a two color (brown and white) rabbit.  


I managed to get one section off a bit without noticing it, but I’m lettin’ that s**t go.  You know, the galloping horse and all.

I’ve made it into a zip pouch that measures 8.25” X 7.25”


My very good friend likes bunnies.
And bunnies like carrots.

The carrot pattern is found at Sugaridoo.


My friend also loves purple.


The bunny pattern was made at the 6” block size and the carrot was reduced to 75% of the original pattern size.

Tuesday, April 19, 2022

Seagull Drop Cloth Pillow


I found this seagull quilt block pattern on Etsy by Nadia Ridgeway of ellisandhiggs.com
When I printed the purchased pattern download and saw the bazillion little fabric pieces I would need to cut, I had the idea to change it into a paper piecing pattern...which I did.


A ways back in time, Selina of Selina Quilts blog, sent me a drop cloth.  She had made a tote and it inspired me to make something with it (that did not happen.....yet).  Last week I pulled out the drop cloth to try it out as a base fabric for a pillow.


I found a great little strip of selvedge dots in my selvedge stash to add into the sand.

Now it was time to begin the pillow cover construction.  I started with putting the zipper in the back piece(s).  The cloth can wiggle some, but it was the raveling that just about ended it for me.  I wasn’t even sure I would finish making the pillow cover.  But as I worked, I learned that as soon as I cut a piece or strip to sew, I immediately took it to the serger and serged all the edges.  Once I did that it was great to sew with.


It has a great texture for the pillow and a more organic look to it than if it were made completely from cotton quilting fabrics.  There are interesting imperfections that appear occasionally throughout the cloth.  I added another selvedge strip to the back for interest.  The fabric the selvedge came from was called World Maps.  Seagulls are all over the world so it fit.


Then I added my little signature tag and a made with love charm to the zipper pull.

The pillow is a 14” square form and has gone to live near the Pacific Ocean.


He’s the quietest seagull I’ve ever met.  I never once heard a peep out of him but I could hear the piercing keow of his relatives in my head all the while making him.

Thursday, December 16, 2021

Paper Pieced Trees Quilt

Oh but I CAN see the forest for the trees!


I’ve wanted to make a little forest of trees for some time now.  Checking that off my list.  And it is a ‘little’ forest.  


When all sewn together, each tree block measures just about 3.25” X 2.25”.
I wanted a selvedge border so I dug around in my selvedges tote for neutral selvedges.


Then the little wallhanging stalled while I figured out how to stitch the selvedges for an inner border.  Of course I eventually figured it out.


Simple in the ditch quilting.


It was finally finished.  I’m SO pleased.


I tried out a couple of tree sizes before deciding.  The tiniest one turned into a cutie pie of a pincushion.
The block was SO TINY it didn’t look fun to sew so I added a bit of a border.  It was still so little.  But so cute.


I now have a very small collection of four little pinnies in my pinnie jar.


I actually use the skeleton one so it doesn’t really live in the jar.


I like that the little trees quilt can be hung for me to enjoy at any time of the year.  Right now it might be a Christmas tree farm.  Later a forest.

Thursday, March 4, 2021

A Mini Pincushion

I have had a tiny paper pieced dress form lying around for some years.  I have been seeing quite a few mini pincushions of late and decided to stitch the dress form into a pincushion.  It measures 1” X 3.25”.


I don’t need another pincushion to use when sewing.  Turid, at densyendehimmel , makes lots of adorable mini pincushions and collects them in a jar.  I thought that makes a creative sewing space decor.  So that is what I plan to do with this mini and others that “might” follow.  Now I just need the perfect jar.


Isn’t this bathing beauty a delight!  She steals the show from the pincushion.
I drew the paper piecing pattern myself and have enlarged and reduced it for intended uses.

The backside.


February 2021 Calendar Journal
I considered not bothering to share it with so much of it in hiding, but what the heck, why not


This new format is no fancy keepsake book or artsy pages.  But they’re simple and quick to gussy up with Washi Tapes, of which I have a large collection of.

Monday, February 8, 2021

The Month of Hearts and Flowers

A small old piece that has been languishing, awaiting inspiration for a finish.  

It was planned to be a pillow.


It was too small as is.  But it would be too large if I added to it.  So it sat.  Stored for quite a long time.

The flower is a rubber stamp image that I enlarged for applique.  The rest of it is paper pieced.


I suddenly realized it was a perfect size as is for the little 12” table top display frame I recently purchased for a cross stitch piece.


I recently made a birthday tag for a small gift.  And that inspired me to do a little more paper crafting with tags.  On Pinterest I found a tutorial for a window technique using acetate.

It started out as a future need of a birthday tag instead of a card.  As I worked on it, it was soon apparent to me that it intended to be a Valentine tag.


It’s a bit of a struggle to keep the acetate clean while working with it, but a not too close look doesn’t reveal that.


I always do a little on the back of my tags.

This prompted me to pull out the heart themed tags I had done in previous years.


Now they all hang out around the house on available knobs.


Or just tucked into a drawer.


I think it’s a fun idea to enjoy them.  I’ll be switching them out throughout the year as I’ve got quite a few tags that have been in hiding for much too long.

My Calendar Journal format has changed once again!  I most likely will be sticking with this easy format for now on.  I’ve printed off the months and am just decorating the blank spacing simply with washi tapes.


Happy Valentine’s Day!

Friday, September 11, 2020

Paper Pieced Table Runner

From Turid’s blog  I learned about  Leila Gardunia’s  free paper piecing scrappy triangles.  I downloaded them and printed them.  They come as a 6” block but I shrunk them down to 4.5” blocks.


I had a limited amount of the the gray fabric so I made blocks until I ran out of it.  


That gave me only 20 blocks.


From sloppy to nice and neat.


It’s a good thing I used a minimum amount of fabrics.   I can get pretty messy when I’m paper piecing.


There weren’t enough to make them into the design I was hoping to use so I worked on alternative layouts.


I decided on blocks of 4 blocks.


I quilted it with too many rows of quilting.  I don’t care for tight quilting lines.  I think they make the piece too stiff.  I removed 2 rows of quilting in each direction.


Much better.  You can still see where I removed quilting lines until it hits the washer.  Then the needle holes will disappear.


The table runner measures 49”x15”

Now that I’ve had that practice I am going to make them at full size for a Christmas quilt in the design I had planned to begin with.

My August calendar journal


Many, many awesomely fun days of sewing last month.


I forgot to cover the personal stuff...Mom is doing fine.

I have to write blog posts with Blog Touch to write them on my iPad.  The app crashes often while writing and adding photos.  Every time it crashes I have to edit the post and then it puts “(Temporary Backup)” in front of my post title.  It does that every time it crashes.  So if you see that, this is why you see it.  I have to edit the title in Blogger dashboard.  Jeezelouise, the hoops we have to jump through sometimes!