Showing posts with label Postcard. Show all posts

Friday, April 28, 2023

April AlphaTable Scraps Challenge

The Alpha Challenge letters for April are
Y and/or N
This year long challenge is hosted by The Joyful Quilter

My postcard for the letter N is everyone’s favorite Neighbor, Nosey Nellie


Next I took advantage of the letter Y to make a couple more Yule postcards to send out come Christmas time.


I used current favorite patterns for postcard making by Bloomin’ Minds. As usual, I have reduced the pattern designs to fit a 4” X 6” postcard size. 


Happy mail day!

Friday, March 31, 2023

March Alpha Table Scraps Challenge

The Alpha Table Scraps Challenge letters for March are 
B and/or U
This challenge is hosted by

Well, the letter B was an easy one for my postcards.

Bird


Bee
(the bee is from the pattern but the flower is from my imagination)


Bunny


U took a bit of thought to avoid an umbrella.

This is Uncle Floyd and he is an Uber driver.


As always, I’ve reduced the Bloomin’ Minds patterns to fit a postcard size (except for the bee, he happened to be the perfect size right off the pattern).

Thursday, February 23, 2023

February Alpha Table Scraps Challenge

The alpha challenge for February is the letter M and/or V. This challenge is hosted by 

Ive made only one postcard for the challenge this month.

M for Man
But don’t you know, his name is Victor.


The Bloomin’ Minds pattern company calls him Slim.


As usual, I have reduced the pattern to fit a postcard.

Sunday, January 29, 2023

Alpha Table Scraps Challenge

I’ve got a plan for 2023 Table Scraps Challenge hosted by 

This year is an alpha challenge with letters of the alphabet.
For January the letter choices are C, R and/or J. 

I’m taking a little break from non-stop quilting and plan to focus on sending out fun postcard mail.  I’ve hit the ground running for January.  I made cards relating to all three letters.
Scraps are all that’s needed for these little mail greetings and wishes. 


For letter C I have a cat and a chicken.  (Along with Christmas)
For letter R I have a reindeer, a rabbit and relatives.


For J I have Joy.


(I’m hoping that when December rolls around again, I’ll have all my Christmas postcards sewn and ready to write and mail.)

Now to give credit to the designers of these fun images…

Cat

Chicken

Reindeer

Rabbit

Relatives

Joy


I’ve reduced all the patterns to fit a 4” X 6” postcard.

I love the always fun and adorable Bloomin’ Minds pattern designs and I’ve sewn several things over the years from the Art To Heart, I Believe book.  

Monday, December 5, 2022

Postcard Craze

I’ve been in a fabric postcard making mood.
A couple of friends and I went to the June Tailor warehouse sale recently, so I made them each a postcard with bits of some of the fabrics I bought there.  Unexpected surprise mail is the best mail…in my opinion.


A recent name draw for Postcrossing…she likes goth, tattoos, Edgar Allen Poe and skulls.


What started this current postcard craze was an idea for Christmas postcards. 


I don’t normally make so many alike.  I put them together assembly line style.  The trees were die cut. 


I was not looking forward to hand stitching so many sequins!  But it wasn’t so bad and went along a lot quicker than I thought it would.


I die cut the words on the backs from metallic paper. 


Happy mail day!

Saturday, November 26, 2022

Japanese Inspired Quilt

A Japanese inspired quilt.


These fabrics were so nice to sew with.


The colors are so rich and bold and laced with gold.


The backing is a quilting cotton, not a Japanese fabric.  With the gold speckles, it went with the Japanese fabrics beautifully.  It’s a lot of red, but so pretty.


There were enough scraps to make a pretty 20” pillow cover.
**the cover is just lying over a pillow for the photo**


More of the scraps make up the backside of the pillow cover.


With still more scraps, I made a snap pouch and wristlet keychains.


The fabrics are a bit heavier than quilting cottons, so they make into a nice weighted throw quilt ready to cuddle under.


I’m trying to avoid continually accumulating scraps.  There are just some bits left.  Enough to make a postcard or two.


Wednesday, September 14, 2022

Bird Postcard Process

Just another bird postcard.  But one different from any other I have made.
He is a quilt block pattern by Nadia Ridgeway of ellisandhiggs.com that I purchased on Etsy.

I redesigned him to be a paper pieced pattern, reduced in size for a postcard.


Here I show a peek into my process of changing a quilt block pattern into a paper pieced pattern that I can sew as a postcard.  Anything can be sewn from the pattern though.  I just happen to love sewing postcards.


Quite an involved process, but the work only needs doing once then the pattern is reusable infinitely after that.  I’m looking forward to a variety of bird colors with this pattern.

Monday, August 8, 2022

Fall Raven

I’ve revisited making a denim raven art postcard.


I’ve stitched the raw edge applique a bit farther into the bird with hopes of getting a more feathered look for him.  I’m much happier with his look this time.  Of course some areas will not fray as much but that is to be expected with fabric.


I love those Fall leaves die cut from that Tim Holtz Eclectic Elements fabric.

Again I used Miracle Fabric for the correspondence side.  A rubber stamp and archival ink for the words.


The two postcards together.


Dies used:
Rachael Bright Sizzix Bigz die Birds
Tim Holtz Sizzix Thinlits dies Leaf Fragments

Friday, May 27, 2022

Postcards From Scraps

I’m linking my scrappy postcards to The Joyful Quilter’s blog for her May 2022 Table Scraps Challenge. https://thejoyfulquilter.blogspot.com/p/2022-table-scraps-challenge.html  
Scraps are perfect for making postcards.  Especially when they are scraps that you really hate to toss out.  But I did toss these scraps out at first.  


I’m working on a quilt using a bundle of Tim Holtz Eclectic Elements called Abandoned2.  It was hard to not keep these pieces...until it finally dawned on me that I could make postcards with them!  I immediately took a break from the two quilts I’m working on, pulled these scraps from the trash and made some postcards for my Tim Holtz grunge loving friends.


As well as a gift tag.


The desire to sew postcard is in full force right now.

I thought I’d try using the painter’s drop cloth as a postcard base.  It works out really well.  Of course serging the edges helps a great deal.  This fabric has a great texture.  I pulled out my scrap bin and just cut shapes with scissors and stitched them down to create a flower.

Oh, look Joy, there’s a square in this one! **snicker**

I think I might like creating a colorful garden of flowers. I certainly have the scraps to do just that.


And then I got started on that garden...


I wish everyone a happy mail day!

Thursday, July 1, 2021

Papercraft Postcard Tutorial

Papercraft Postcard Tutorial

You can see all the handmade papercraft postcards I’ve made over the years here

I’m sure there are many ways to make a papercrafted postcard.  This tutorial is how I make many of mine.


The most important thing in making a papercrafted postcard is to make sure it is sturdy and nothing added to it will come loose in the mail.

I began with a 4”X6” piece of 70lb sketch/drawing papers.  I sprayed them with Distress Oxide Spray then sprayed one of them again through a stencil.  I chose the one on the right to work with this time.


I’ve rubber stamped the words with a waterproof Archival ink and toned down the brightness of the background paint by rubbing the ink over it lightly and darkened the edges.


I’ve used cutting dies to cut flowers and leaves from the same 70lb sketch/drawing paper.


I’ve painted them with watercolors.  (Sometimes you just have to hope your mail won’t get rained on.)


Before gluing the flowers to the postcard, I splattered thinned black acrylic paint to the background.
I use a spray glue to adhere the flowers and leaves to the background.  I then press them down firmly with a Brayer.  When dry, if there are any loose edges, I use a fine tip glue to get underneath the loose area and glue it down firmly.
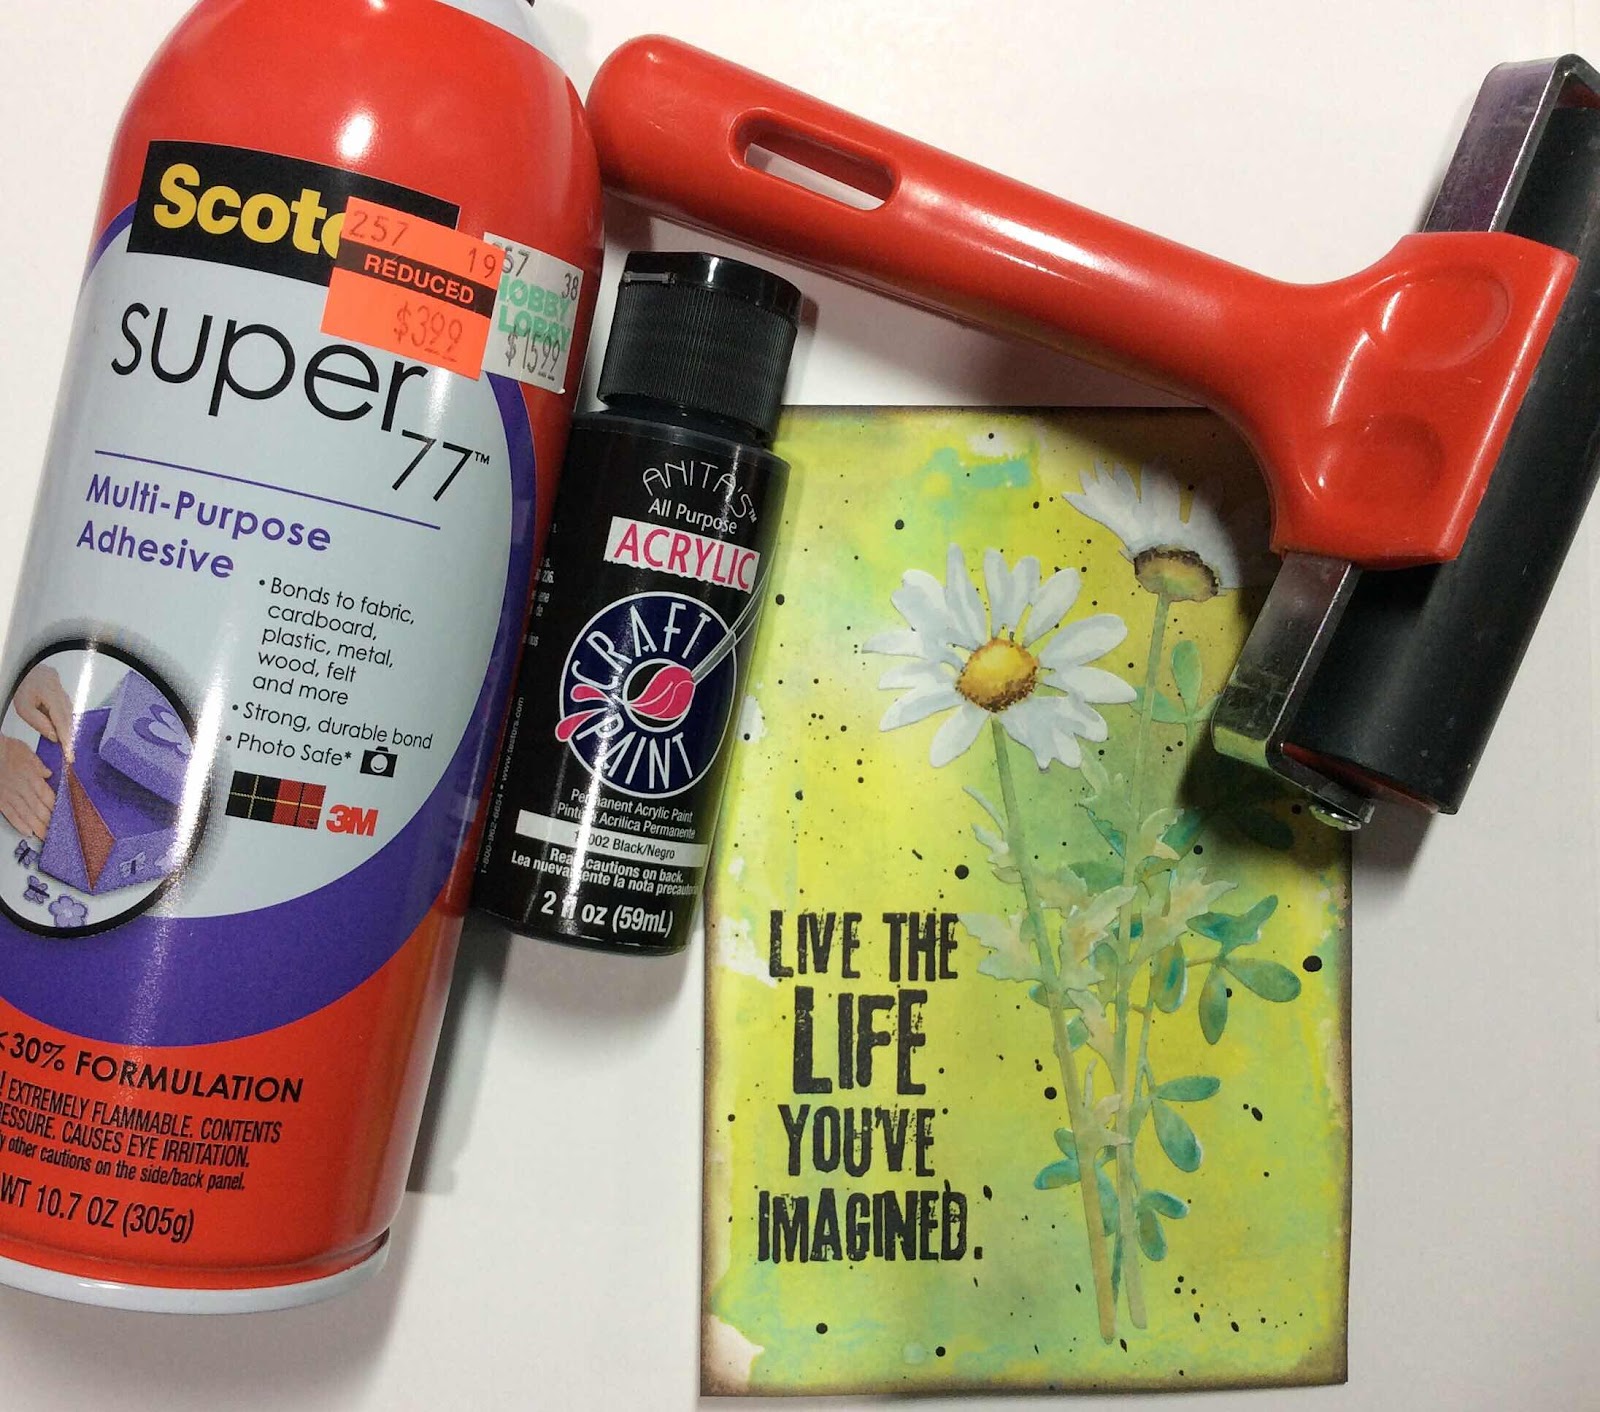

When my postcard front is finished, I glue it to a heavier paper.  This Canson XL paper is 98lb.  I glue it to a piece larger than my postcard then trim around the postcard.  Set the postcard under a flat weight so that it dries flat.  Check the edges to make sure they are one.  Any loose edges can be glued with a fine tip glue.  If you don’t have a fine tip for your glue, put some on a toothpick to smear where needed.


It is now a sturdy piece of art that will travel through the mail easily and not get caught in any of the postal machines.

Art can sometimes leave the finished piece warped and even messy on the back.  Working on one paper to create your art then adhering it to a clean paper will help to flatten the piece and you don’t have to worry about a messy backside.


The back can be decorated also, just like any other postcard.
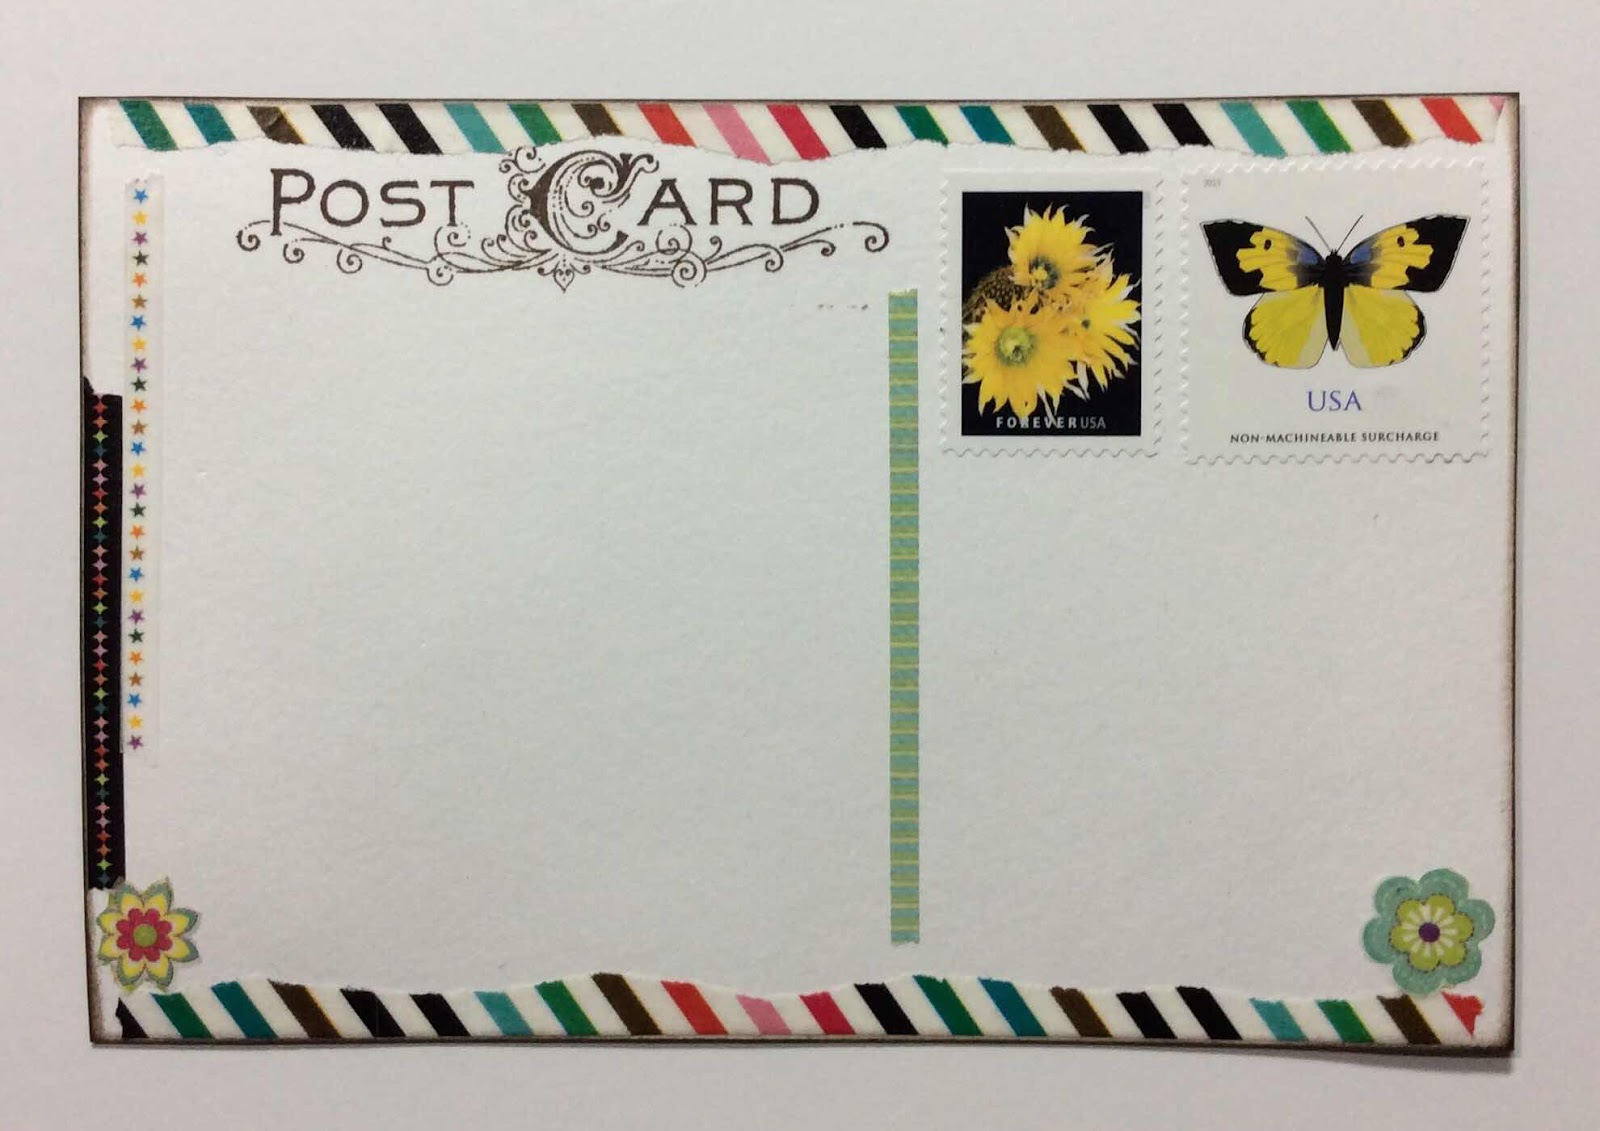

Within the United States, a papercrafted postcard can be mailed at the regular postcard rate (unless you’ve added something that will make in non-machinable.  In that case, extra postage is needed.

There are so many different ways to make a papercraft art postcard.  But as I mentioned previously, make sure it is glued and put together well and that it is sturdy enough to withstand the traveling it will do.  

Most of my handmade postcards arrive at their destinations as if they were hand delivered.

If you have any questions at all or need some further detailed info, I am more than happy to help out with both.

Happy Mail Day!
Annie